
Last updated July 25, 2026
Dryer Vent Cleaning Troubleshooting: Common Problems and How to Fix Them
A dryer that takes two cycles to dry a load isn’t broken - it’s probably suffocating, and the fix may cost $150, not $600. In our 42 years serving Los Angeles homeowners, we’ve arrived at hundreds of calls prepared for a vent cleaning and found the real problem was a $12 thermal fuse or a $400 heating element. But the reverse happens far more often: appliance repair technicians replace parts that never needed replacing, while the actual culprit - a restricted vent line - keeps choking the machine. This guide walks you through reading your dryer’s symptoms like a technician would, so you know whether you’re looking at a vent problem, an appliance problem, or both.
Quick Answer
Most dryer performance problems - extended dry times, overheating cabinets, burning smells, and humid laundry rooms - trace back to vent restriction rather than appliance failure. A simple five-minute airflow test at your exterior vent hood can confirm whether the problem is in the ductwork before you spend money on service calls or parts.
Table of Contents
- Symptom-by-Symptom Diagnostic: What Your Dryer Is Telling You
- The Five-Minute Airflow Test Every Homeowner Should Know
- Sudden Blockages: Bird Nests, Wasps, and Collapsed Dampers
- When Cleaning Doesn’t Fix It: Secondary Causes
- Appliance Versus Vent: Knowing When It’s the Dryer Itself
- Common Mistakes to Avoid
- When to Call a Professional
- Frequently Asked Questions
Symptom-by-Symptom Diagnostic: What Your Dryer Is Telling You
Dryers are simple machines. They heat air, tumble clothes through it, and exhaust moist air through a vent. When that exhaust path narrows, symptoms appear in predictable patterns. Here’s what we’ve learned from thousands of dryer vent cleaning calls across Los Angeles.
Extended Dry Times (Two Cycles or More)
This is the most common complaint, and vent restriction is the leading cause. A standard load should dry in 45-55 minutes. When dry times stretch past 75 minutes, the moist air isn’t leaving the drum fast enough.
In Los Angeles, where many homes built between 1945 and 1975 have original vent runs of 20 feet or more through attics or crawl spaces, lint accumulation happens gradually enough that homeowners adapt without realizing. They start running “small” loads, or they pull clothes out slightly damp and call it “energy efficient.” The vent line is the first place to check.
What to check: Start the dryer on high heat and time how long it takes to reach full exhaust temperature at the exterior hood. More than three minutes suggests restriction. Also note whether the exhaust air feels weak compared to a bathroom fan - it should be forceful enough to make a tissue flutter steadily against the hood.
Excessive Heat on the Dryer Cabinet
The cabinet should be warm, not hot to the touch. If you can’t keep your hand on the top or side panel for more than a few seconds, the dryer’s internal safety thermostat is working overtime because heat isn’t escaping.
This is where vent problems become dangerous. That excess heat degrades wiring insulation, warms the drum bearings prematurely, and in extreme cases, can ignite accumulated lint inside the machine itself. Los Angeles Fire Department data consistently ranks dryer fires among the top five causes of residential fires in older neighborhoods like Highland Park and Eagle Rock, where original vent configurations weren’t designed for modern high-capacity dryers.
Burning Smell
A hot, dusty odor usually means lint is contacting the heating element or exhaust path is so restricted that internal temperatures are spiking. This is not a “wait and see” symptom. Unplug the dryer and inspect the vent line before running another cycle.
The smell often appears first in homes with flexible foil or plastic transition ducts behind the dryer. These materials sag, collect lint in low spots, and can actually melt or ignite. Los Angeles building code now prohibits their use in new installations, but millions remain in older homes from Venice to Van Nuys.
Laundry Room Humidity and Condensation
Moist air escaping through gaps in the vent line, or backing up through the dryer drum when exhaust pressure is too low, raises humidity in the laundry space. You’ll see it on windows, smell mustiness, or notice mold spotting on adjacent walls.
In coastal Los Angeles neighborhoods like Santa Monica and Playa del Rey, where ambient humidity already runs higher, this symptom gets misdiagnosed as a “coastal moisture problem.” Homeowners run dehumidifiers when they need a vent repair.
The Five-Minute Airflow Test Every Homeowner Should Know
This test costs nothing and reveals whether your vent line is the problem before you call anyone. We teach it to every homeowner who asks whether they need service.
- Locate your exterior vent hood. It’s usually on a side wall, sometimes on the roof. Note whether it has a flap that opens with airflow, a louvered cover, or a screen.
- Start the dryer on high heat. Let it run for two full minutes to reach operating temperature and establish airflow.
- Check for movement at the hood. The flap or louvers should open fully and stay open. Partial opening indicates restriction. No movement means severe blockage or a disconnected line.
- Feel the exhaust force. Hold your hand 6 inches from the opening. The airflow should be strong and steady, roughly comparable to a hair dryer on low. Weak, pulsing, or intermittent flow points to partial obstruction.
- Check temperature. The exhaust should be hot but not painfully so. Scorching air combined with weak flow means severe restriction - the heat has nowhere to go.
What the results mean: Strong flow and full hood movement suggest the vent line is clear, and your problem likely lies in the dryer itself. Weak or absent flow means restriction exists somewhere between the dryer and the exterior hood. The location of the blockage - transition duct, main run, or hood - determines whether you can address it or need professional equipment.
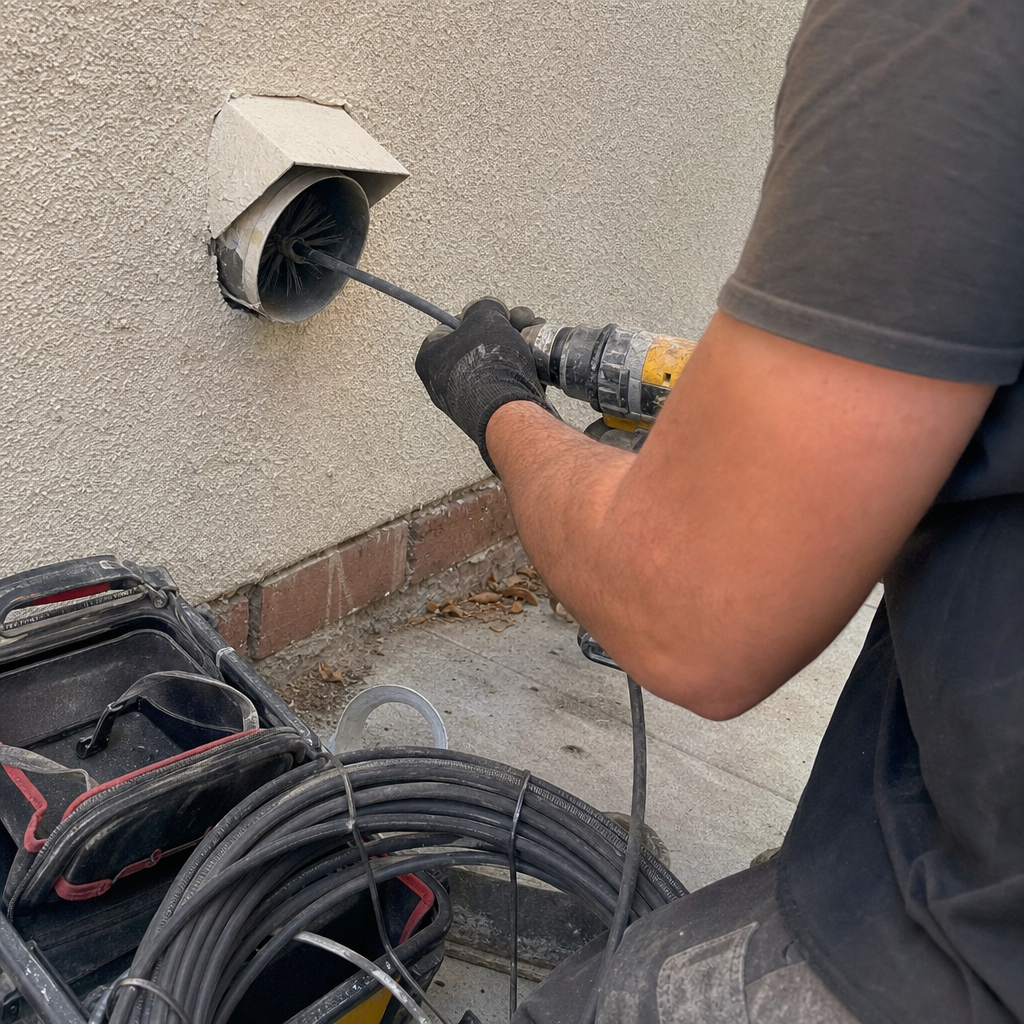
One Los Angeles-specific note: In hillside homes from the Hollywood Hills to Pacific Palisades, long vertical vent runs to roof exits are common. These create natural lint accumulation points and are nearly impossible to clean thoroughly without rotary brush systems like the Rotobrush and Nikro equipment our technicians carry.
Sudden Blockages: Bird Nests, Wasps, and Collapsed Dampers
Not all vent problems develop gradually. Some appear overnight, and they mimic catastrophic appliance failure because the dryer worked fine yesterday and won’t dry at all today.
Bird Nests
House finches and sparrows find dryer vent hoods irresistible in spring. The warm air, the sheltered cavity, the ready building material of accumulated lint - it’s ideal nesting territory. We’ve pulled nests completely blocking 4-inch ducts in a single season’s work.
The giveaway: A dryer that worked last week now takes three cycles, and you may hear chirping or scratching from the wall. The exterior hood’s flap may not move at all. In Los Angeles, where mild winters mean early nesting (February is common), this is a spring ritual for us.
What you can do: Remove the exterior hood if it’s accessible from ground level. Most nests are within arm’s reach of the opening. Wear a respirator mask - bird droppings carry histoplasmosis and other pathogens. If the nest is deeper than 18 inches, or the vent exits on a second story or roof, call a professional with pole cameras and extraction tools.
Wasp and Bee Nests
Paper wasps build in vent hoods during late summer and fall, when queens are establishing next year’s colonies. The nest may not fully block airflow initially, but as it grows, backpressure increases. Unlike birds, wasps present a sting hazard that makes DIY removal inadvisable for most homeowners.
We’ve arrived at calls where the homeowner sprayed insecticide into the vent line, killing the wasps but creating a wet mass that hardened into a more stubborn obstruction. The correct sequence: eliminate the colony, then remove the nest material, then verify clear airflow. We coordinate with pest control when needed and clean the vent after.
Collapsed or Stuck Dampers
Many Los Angeles homes have the original gravity-operated dampers installed in the 1970s or 1980s. These metal flaps corrode, the hinge pin seizes, or the flap detaches and wedges in the closed position. From inside, the vent line tests as completely blocked.
The diagnostic: Strong airflow at the dryer’s internal blower (you can feel this by disconnecting the transition duct), but nothing at the exterior hood. The blockage is at the terminal end. Replacement with a modern louvered hood, properly sealed, solves it permanently.
When Cleaning Doesn’t Fix It: Secondary Causes
We believe in camera verification because “cleaned” doesn’t always mean clear. If you’ve had your vent cleaned and symptoms persist, investigate these secondary causes before blaming the appliance.
Incorrect Vent Diameter
A 4-inch diameter duct is standard for residential dryers. We’ve found 3-inch ducts in older Los Angeles apartments and illegal 5-inch “upgrades” in some DIY installations. Three inches can’t move enough air for modern dryer capacity. Five inches sounds better but reduces airflow velocity, allowing lint to settle rather than carry through.
The fix: Replace with proper 4-inch rigid metal duct, or transition to the correct diameter at the dryer connection.
Duct Material Incompatibility
Los Angeles building code requires rigid metal ducting for concealed dryer vent runs. What we actually find:
- Flexible foil transition ducts used as permanent runs through walls and attics. These sag, trap lint, and are now prohibited for concealed use.
- Flexible plastic or vinyl in pre-1990 installations. These are fire hazards and should be replaced immediately.
- Thin-walled “duct tape” repairs where sections have separated, creating lint leaks into wall cavities.
- Corrugated “semi-rigid” aluminum used for full runs. Better than foil, but the corrugations still trap more lint than smooth-wall rigid duct.
Our technicians carry smooth-wall galvanized steel and proper fastening hardware. A camera inspection before work shows you exactly what material is in your walls.
Excessive Run Length or Elbows
Every 90-degree elbow adds equivalent resistance of about 5 feet of straight duct. Dryer manufacturers specify maximum effective run lengths (typically 25 feet for rigid metal, reduced for each elbow). In Los Angeles hillside construction, we’ve measured runs exceeding 60 feet with four elbows - a configuration guaranteed to underperform regardless of cleaning frequency.
Solutions include adding an inline booster fan (properly rated for lint exposure), rerouting to a closer exterior wall, or in extreme cases, relocating the laundry equipment.
Damaged or Disconnected Duct
Rodents in crawl spaces, earthquake settling, or simple corrosion can separate duct sections. The dryer blows into a wall cavity or under the house. You feel some airflow at the hood because of building pressure, but not enough to dry clothes. A camera inspection finds these immediately - it’s why we camera every job, every time.
Appliance Versus Vent: Knowing When It’s the Dryer Itself
Sometimes the vent is clear and the dryer is genuinely failing. Here’s how to tell before you pay for a service call.
Error Codes That Indicate Mechanical Fault
Modern dryers display codes that point to specific component failures. Common ones:
- AF, F-01, or similar airflow codes: These indicate the dryer’s internal sensor detects insufficient exhaust. Could be vent restriction, but could also be a failed blower wheel or blocked internal lint screen (separate from the removable filter).
- HE or heating element codes: Usually the element, thermal fuse, or cycling thermostat. A clear vent doesn’t prevent these from failing with age.
- TE or thermistor errors: Temperature sensor failure. The dryer can’t regulate heat and may shut down prematurely or overheat dangerously.
One critical distinction: If your vent tests clear (strong airflow at the hood) and you still get airflow error codes, the dryer’s internal blower or sensor is suspect. If the vent tests restricted and you have no error codes, clean the vent first before assuming appliance failure.
Behaviors That Point to the Dryer
No heat at all, but drum turns: Check the thermal fuse first (a $12-$25 part), then the heating element, then the cycling thermostat. These fail with age regardless of vent condition.
Heat but no tumbling: Drive belt, motor, or idler pulley. Purely mechanical.
Loud rumbling or squealing: Drum support rollers or bearings. Vent restriction can accelerate wear by overheating components, but the noise itself is mechanical.
Clothes come out scorched: Usually a stuck heating relay or failed cycling thermostat, not vent restriction. A restricted vent causes extended dry times, not burning.
Our position: We’re vent specialists, not appliance repair technicians. When our camera inspection shows a clear vent line and the dryer still malfunctions, we’ll tell you honestly that you need an appliance service call. We’d rather earn your trust for the next air duct cleaning than sell you a service you don’t need.
Common Mistakes to Avoid
- Replacing the dryer before checking the vent. We’ve seen $1,200 dryer purchases solve nothing because the 20-year-old galvanized duct was packed solid. Run the airflow test first.
- Using a leaf blower from the interior. This seems logical but can compact lint into a denser blockage, or separate duct joints in attic runs. Professional rotary brushing pulls lint toward the vacuum, not deeper into the line.
- Ignoring the transition duct behind the dryer. The 6-foot flex line is the most lint-trapping section in the entire system, yet homeowners focus on the exterior hood. Check and replace this every 2-3 years.
- Installing screens over the vent hood. Screens catch lint and create maintenance headaches. Use louvered or flapped hoods designed for dryer exhaust. In Los Angeles, where Santa Ana winds carry debris, a proper hood design matters more than added screening.
- Assuming “it was cleaned two years ago” means it’s clear now. Cleaning frequency depends on laundry volume, fabric types, and vent configuration. A family of four with pets may need annual service; a single person with short duct runs may go three years.
- Running the dryer while away or asleep. This is when restricted vents cause fires. The NFPA reports most dryer fires occur in cycles unattended by occupants. If your dryer’s performance has changed, don’t compensate by running it overnight.
- Accepting “vent cleaning” without camera verification. If you can’t see it, you don’t know it was done. Our before-and-after camera documentation is standard on every job - not an upsell, not optional.
When to Call a Professional
Call a vent specialist when the airflow test shows restriction you can’t reach, when the vent exits on a roof or second story, when you’ve cleaned the accessible parts and symptoms persist, or when you suspect duct damage inside walls. Call an appliance technician when the vent tests clear and you’re seeing specific mechanical symptoms - no heat, no tumble, error codes pointing to components.
Bellows Air Duct & Vent Co. offers free estimates in Los Angeles. We’ll run the airflow test, camera-inspect your ductwork, and tell you exactly what we find before any work begins. Our pricing is upfront - the number on the phone is the number on the invoice. If you need service, most jobs finish in a single visit, and everything we do carries our 90-Day Done Right Promise in writing. Call (844) 685-6342.
Frequently Asked Questions
Most residential dryer vent cleanings in Los Angeles range from $150 to $275 depending on vent length, accessibility, and whether roof access is required. Bellows provides no-hassle upfront pricing before work begins - no bait coupons, no price changes at the door. Call (844) 685-6342 for an exact quote; estimates are free.
Annual cleaning is right for most Los Angeles households with standard usage. Homes with large families, multiple pets, or long vent runs through attics may need service every 6-8 months. If your dry times have increased or the cabinet runs hot, schedule now regardless of when you last cleaned.
You can clean the transition duct behind the dryer and the exterior hood if safely reachable. For the main run through walls or attic, professional rotary brush equipment with HEPA vacuum extraction is necessary to remove lint completely without damaging ductwork or compacting debris. In Los Angeles, where many vents run 15-25 feet with multiple elbows, DIY attempts often leave significant restriction.
Three common causes: the cleaning didn’t reach the full run (ask for camera verification), the vent configuration itself is inadequate (too long, too many elbows, wrong diameter), or the problem is in the dryer (failed heating element, blower, or sensor). Bellows technicians investigate all three before concluding a job.
Flexible plastic and vinyl are prohibited for all uses. Flexible foil transition ducts are permitted only for the short connection between dryer and wall inlet, not for concealed runs through walls, floors, or attics. Rigid metal duct is required for permanent installations. If your home still has prohibited materials, replacement is strongly recommended for safety and performance.
Codes specifically referencing airflow (AF, L2, various manufacturer-specific codes) most often indicate vent restriction, but can also mean blower failure. Codes for heating circuit, temperature sensor, or motor faults point to the appliance. The definitive test is external airflow measurement at the vent hood - strong flow means look at the dryer; weak flow means clean the vent first.
The Bottom Line
Most dryer performance problems are vent problems, not appliance problems. The five-minute airflow test at your exterior hood gives you a reliable diagnostic before you spend money. When restriction is confirmed, professional cleaning with camera verification ensures the job is actually done, not just claimed. When the vent is clear and symptoms persist, you’ve narrowed the problem to the dryer itself - valuable information that saves unnecessary service calls. In either case, knowing how to read your dryer’s symptoms puts you in control of the repair decision.
For homeowners in Los Angeles who want the vent checked right and documented, Bellows Air Duct & Vent Co. provides camera-inspected dryer vent cleaning with upfront pricing and our 90-Day Done Right Promise. We also handle HVAC cleaning and full air duct services. Call (844) 685-6342 for a free estimate. Ask about our $89 Seasonal Tune-Up, $50 off any repair over $250, free second opinion on any written estimate, and permanent 5% senior and veteran discount.
Written by the team at Bellows Air Duct & Vent Co., serving Los Angeles since 2012.